Showing posts with label beginners. Show all posts

Sunday, August 16, 2009

Paeonia Yellow Crown et al.


A statement like, I cultivate gorgeous peonies, sounds borishly over confident and yet I can say it because it's just what I do. You can too. Why? Because the peony is a survivor. Having said that, I must make issue with the fact that it doesn't appreciate being disturbed. Move one plant half a dozen times and maybe the peony isn't cut out for you. However, if you are decisive and know just where you want to locate your peonies, you're all set. Two factors really ensure the peony's survival, 1) try to locate a plant with a bit of protection from the wind and 2) don't locate it in a heavily shaded spot. Now, I've seen big, beautiful blossoms from peonies planted in fields where they were buffeted constantly from Midwest winds and others who thrive even though they must stick their stems out to catch a few rays. I have peonies scattered throughout my garden beds, some thriving in not so ideal locations. Other than the obvious, that's the beauty of the peony.

I'm going to leave the expert advice on proper cultivation to the experts and just talk about the fun stuff like, how I unexpectedly acquired three Yellow Crown peonies this weekend. If you aren't already aware of it, now's a great time to rummage around in your local nurseries for end-of-the-season bargains. Most nurseries want to reduce the amount of nursery stock they have to take inside for the winter. It's a plus-+ for filling out bare spots in garden beds. The Yellow Crown peony, pictured above, is actually a tree peony. A tree peony is a shrubby, deciduous plant which develops woody stems, growing between three and six feet tall. A herbaceous peony, pictured below, is a hardy perennial, growing between 18 and 36 inches tall with foliage that dies back each winter. Cost is a huge factor between the two types. A healthy young tree peony can easily range between $30-$100 whereas a common herbaceous peony will cost between $10-$30. Today, I paid $10 each for the Yellow Crowns I brought home. Yipeee! Of course the tree varieties were few but right now, the herbaceous varieties are still many. The Bowl of Beauty (above) can be found for around $8. A super variety, mine flower profusely each spring.

Here's a tip if you've never grown peonies before: Mix a bit of compost and a pinch of bonemeal into the hole when planting. Also, it's hard to tell in late summer if the plant has flowered, a good indication it will again flower in the coming spring. So, choose a nice large specimen. I've bought scrappy little plants in the past thinking they'll catch up. Wrong. Scrappy little peonies rarely produce. If the specimen you are looking at, yes, even on the bargain table, isn't robust and healthy, pass it up. Guaranteed, you'll find nice sized plants at a reputable nursery.

If your local nurseries don't discount plants, maybe you should be asking: why not? Luckily, I have many nurseries to choose from in my area. Most move stock by discounting but one in particular rarely ever discounts anything, heaven forbid has a (cringe) clearance table. I asked why not and was told very matter-of-factly that their grower fully refunded any damaged, dead, or even simply unsaleable plants. Really? Isn't that why big box stores get a bad rap from gardeners? Because they can throw in the dumpster for 100% reimbursement what the small moms & pops cannot? I don't boycott the big box stores either, unless they are dressed up as something they are not. Enough said.

Now is the time to plant for a showy next spring. In our area, there's plenty of time to get new perennials rooted in before the first frost. And, in a couple more weeks, the new fall bulbs will be out. I checked with my favorite nursery and the tulip, daffodil, and hyacinth bulbs will be on sale the last weekend of August. Good times.

Speaking of bulbs, rhizomes, and roots, I've started bare root peonies in my gardens. If planting bare root, look for a root with three to five well developed eyes, which are little red bud formations. Make sure that the eyes are planted no more than two inches below the soil line. Planting any deeper is an exercise in futility as the peony won't bloom. That's why I really like to plant potted peonies. Don't bury the crown of the plant and the guess work is all done.

Hey, I love to hear about your garden finds. Email me. And oh yeah, Tuesday Morning has a popular ergonomic line of gardening tools for 50% off retail while supplies last. You're welcome!

Monday, July 13, 2009

In Love with the Perfect Tomato: A Summer Treasure Grown on the Vine


When I'm talking to other gardeners about vegetables, I rarely hear much excitement in their voices over the subject of cucumbers or zucchini or green beans but all that changes when the conversation turns to tomatoes! I'll admit, I've carried out long passionate diatribes about the subject myself. Those of us who toil in a vegetable patch know there's no event more important than the first ripening of the season. I can't think of any other vegetable that elicits such ectasy, such unbridled sensual joy as biting into a ripe, juicy tomato. If you think I'm a bit wacky, you just run on down to your local supermarket and see if I'm not telling the truth. Rush right over to the tomato display, pick up a beautiful specimen and take a large bite of its pithy, tasteless flesh. Commercially grown tomatoes are for throwing, silly rabbit!

Anyway, I picked my first ripe tomato this season on the 4th of July. Happy! Not long after I pick the first, the rest tend to follow. In the above picture is an example of my favored child, Pink Girl. I picked it Saturday. Now I don't know about you, but when your tomato fills your hand, what larger joy can top that? In fact, there are others still on the vine bigger. Of course I'm bragging! After the serious conversations about growing tomatoes comes the garden rites of picking and then bragging about size. Okay, so I'm a woman and maybe my hands are small. Picture the same tomato, let's say, next to a pop can . . .

Alright, I'm done talking trash. Let's talk about varieties. In the picture are four different types I pulled out of the garden this weekend. Of course you can all spot the pink girl, at the 9 o'clock position. At the 12 position is jubilee. It is much like the pink girl in size and shape but has medium yellow flesh and has a more acidic taste. It's about the best yellow tomato I've grown. So far the plants are doing well and are setting nicely. In the 3 o'clock position are two pink oxheart. Don't waste your time. This plant is a 50/50 shot. What do I mean by that? Well, the plants are either very sturdy or very spindly. The tomatoes that set are both very sizeable or very scrawny. What I'm trying to say is it's not a variety where you can count on consistency. The flavor is, uh, okay. Moving on to the 6 o'clock position is amana orange. Both pink oxheart and amana orange are heirlooms and both won't be grown in my garden next year. The amana orange performs about the same as pink oxheart. The only difference between the two is taste. I liked the flavor of amana orange.

I'll be comparing some more later as I have other varieties ripen. This has been an experimental year for me. One that looks promising is Black Krim. I am on pins and needles for this one to ripen. The tomato is large. I would estimate it to be twice the size of the pink girl when it's ready. This is also an heirloom of the German varieity, I believe. Unlike the pink oxheart and amana orange, this is a consistent variety. It's plants are strong and set well.

Let's move on to some gardening advice. If you haven't already, it's time to help your tomato plants perform in the heat of summer. Last week I carefully loosened the dirt at the base of the feeder roots so that the tomato plants could easily drink more water. If that soil becomes compacted, either hand watering or rain will hit and run off. You want that moisture to penetrate all around the plant. I also worked a pelletized fertilizer into the soil. When the temperatures soar into the triple digits, its hard for any plant to set. Yes, they love warm weather but they'll expend their energy trying to stay alive and not set when it's an oven outside. So, make sure they can drink and feed heartily during extreme heat.

Now for a tip that's invaluable: My grandmother grew the most aromatic, succulent tomatoes in the whole world. I strive every year to emulate her gardening abilities. One thing that she stood firmly on was the use of bloom set. Why? Well, she gardened on a farm in south east Kansas where the rain fall is less plentiful than it is right here in the KC area. They relied on well water for their own needs so water was precious and not wasted. By using bloom set, Grandmother was helping her plants to grow and prosper. Bloom set can help a struggling tomato plant set more tomatoes. What I find is that bloom set also helps flush out a plants foliage. There's a visible difference in plants when bloom set is applied to the yellow blossoms. It encourages healthy growth in both plant and fruit. I pulled over 1800 tomatoes out of my garden last year. I think my grandmother had it going on! Lucky for me, with the advice of sage gardeners, my tomatoes do too!

Thursday, June 25, 2009

Surviving the Scorching Heat in Style

It's been a blistering few days here at Blessing Hill as we've tried to survive not only the heat but the humidity as well. Luckily for us (me, the flowers, the dog) God sent some rain to intervene. We've had rain both Tuesday and Wednesday nights after some really unbearable temperatures. I'm talking daytime heat indexes of 110. It's a real testament to what holds up well in the garden. Of course there's always the tropical plants like elephant ears which thrive on this weather. My dwarf uprights have filled this swan planter with an abundance of foliage. Nice. But there are plants, perennial workhorses, who keep the garden fresh and beautiful no matter the degree of the inclemency. Here are some of my favorites:

Echinacea or Coneflower

A native of central and eastern North America, this hardy perennial survives diverse weather conditions from dry prairies to open woodland. It's being bred so that almost any color is available. My favorite varieties are white swan pictured, pink double delight, and coconut lime. However, I have several of the simply normal purple sprinkled through my gardens. They perform. When other flowers are wilting under the glare of an obtrusive sun, coneflowers are in their glory. Because coneflower is such an old garden standby, it can be dismissed for being too common. But, when the heat is scorching every parcel, you'll be glad you planted them. Zones 3-9, from Michigan to Louisiana.


Achillea or Yarrow


With around 85 species of this versatile perennial, I have to wonder why we don't see more variety in our nurseries. I would love to see a nursery carry a. clypeolata or a. ptarmica. Maybe I've just missed them when shopping. Anyway, I have several varieties in my own garden from pink grapefruit to moonshine, pictured is apricot. This season I've planted paprika and King Edward, red and light yellow respectively. There's a size, color, and light requirement for every need. The King Edward is a tiny yarrow, growing no more than six inches tall and spreading no more than nine inches in diameter whereas Moonshine can get up to three feet tall and two feet wide. Most flower all season with regular deadheading. Wonderful.


Hemerocallis or Daylily
This perennial can boast that it has over 50,000 named cultivars. If a person cannot find a size, color, and light requirement to fit the bill then maybe that person should just not grow daylily. These garden warriors can survive zones 3-10, preferring full sun but tolerating some shade. I have Stella de Oro planted in beds that receive full sun from dawn to dusk and in beds that appreciate the sun just till noon. In both places, they preform beautifully. Daylilies make exceptionally good border plants. When in bloom, there's not much showier. Just look at this gorgeous Barbara Mitchell I picked up at the end of the season clearance at a local nursery. What a gem. I have around 10 different daylilies in my garden beds and each year they just get better.


Some other heat tolerant favorites are rudbeckia, tall phlox, sedum, tanacetum vulgare, scabiosa, and oenothera.


Tomato Talk:

In a previous posting, I discussed Spectracide Immunox 3-in-1 Insect & Disease Control Plus Fertilizer. I'm happy to report that after spraying my plants, no further foliage damage was incurred. I pulled back the mulching material to increase air circulation, applied a balanced water soluble food, and watered vigorously. The plants look marvelous and are they ever setting tomatoes! Tomatoes love heat but not humidity because without proper air circulation, humidity breeds fungus. The straw I initially placed around my tomatoes to keep them moist in order for them to establish later becomes a problem if the air can't penetrate during humid conditions. So, problem solved.

Pictured are my Amana Orange tomatoes, a new variety I'm trying this year. Other new varieties to my garden include Cherokee Purple, Granny Smith, Black Krim, Pink Oxheart, and Orange Oxheart. I'm really experimenting this year. Usually, I'm a stolid Pink Girl grower. And yes, there are plenty of Pink Girls thriving. It's a race between one Pink Girl plant and a Black Krim plant to see who will have the first ripe tomato. I'll let you know if I would recommend any of the new varieties for next year's garden.

And, ooohh . . . EYES OPEN FOR THE GREEN HORNWORM! Yesterday, I was trimming my boxwoods and out on the ground fell two big, fat hornworms. Double Yuck!


Wednesday, June 17, 2009

Spectracide Immunox 3-in-1: Combating Diseases that Arise from Elevated Temps Heating Moisture Soaked Ground

Here in the heart of the country, we've been having some pretty significant storms. (Those of you in Drexel, MO, our prayers are with you for a quick recovery.) The rain fall totals, at least in the KC area, are above normal according to our weather forecasters. At Blessing Hill our grounds are ponded in places. The flower and vegetable beds are soaked. The tractor wheels churn water when I'm hauling around the trailer. But, it's not all bad. This has been great for the perennials, shrubs, and trees we've planted this season. At last count, I believe we were up to 16 new trees alone. I'm grateful not to be dragging the water hose or paying rural #6 those increased water rates.

And luckily for us, up until now, the temperatures have stayed an unbelievable 70's for the most part. These first 15 days of June were unlike any I've ever seen---chilly mornings for sleeveless shirts. Well, today that's coming to an end. We are going straight from comfortable to downright miserable with above normal temps and sweltering humidity. What might be great weather for my tropical weather loving friend the pink tiger lily pictured above, isn't such great weather for plants prone to fungus like Oenothera speciosa Siskiyou, Mexican Evening Primose, featured in the second picture. It prefers to be on the dry side. When its roots stand in moist, warm soil, a powdery film develops on its leaves. This is also said for most types of tall phlox. It's not detrimental to the plant's well being but it looks bad and the leaves don't fill out.

I'm an advocate for limited use of chemicals in the garden. But let's face it, sometimes it's necessary. Before applying a chemical fungicide, you could try spraying plants with a mixture of 1 teaspoon baking soda, 1/4 teaspoon vegetable oil, and one quart of water to control powdery mildew. Unfortunately, that didn't work on my Siskiyou. However, what seems to have good results is a product from Spectracide called Immunox 3-in-1 Insect & Disease Control Plus Fertilizer. This product is a combination of insecticide, fungicide, and fertilizer. I sprayed my Siskiyou with Immunox and the problem subsided for about four weeks which is pretty typical with this type of all-in-one fungicide. With the powdery mildew gone, the leaves were able to become lush, supporting new growth.

Yesterday, I noticed that nasty leaf blight beginning to develop on my tomatoes. Once that gets started it's a nightmare to combat. The first thing to do is pull back any mulching material and allow the sun to begin drying the soil around the plant. This also improves air circulation which is crucial in healthy development. Pick up any plant debris and dispose of immediately. Remember, don't compost any part of a tomato plant to prevent future contamination. Water early in the day to allow foliage to dry before evening. Since just a few of my plants are infected, I decided to take preventative measures. I don't want the fungus to spread to my other tomato plants. I got out the Immunox and read the label from beginning to end but there was no mention of use on tomatoes. Every chemical manufacturer lists contact information included in the labeling. I called the toll free number and spoke to a product specialist who assured me that Immunox was safe to use on the tomatoes. I'll let you know how it did in a future posting.

Immunox is also designed to work well on roses prone to black spot. I plant mainly shrub roses for their ability to withstand disease. Imagine my dismay with my David Austin's Mary Rose shrub rose when it developed black spot. It was my understanding that the Mary Rose was the most consistent and tidy performer of all English roses. Well, it might be elsewhere but not in my garden. (Still by and far my favorite is Lady Elsie May who I think outshines all other shrub roses.) Mary Rose sprung to life this spring with a robust vigor and bloomed profusely before shedding all her leaves to black spot. I've sprayed her with Immunox and I'll also let you know how that fairs in a future posting.

Here's a list of diseases Spectracide Immunox 3-in-1 cant prevent and/or treat:

Black Spot

Brown Patch

Dollar Spot

Powdery Mildew

Rust

Blight

Leaf Spot


Insects it kills:

Aphids

Spider mites

Leafhoppers

Bagworms

Cicadas

Cankerworms

Webworms

Inchworms

Leafminers

Mealybugs

Thrips

Whiteflies

And, when applying Immunox, the plant receives a dose of fertilizer albeit a minor amount. I would suggest continuing with whatever fertilizer program you use.

Thursday, June 11, 2009

For the Love of German Bearded Iris

Sunshine & Snow I can't imagine a cottage garden---or any other garden for that matter---without the presence of German bearded iris. I remember when I first fell in love with these rhizomatous perennials. A few blocks from my childhood home lived a woman who tended an extremely large iris kingdom. I don't think she had need of a lawn mower because the iris had taken over every patch of ground but what the house sat upon. In May, her yard was a riotous canvas of brilliant color. Now, all these years later, I can't imagine just how many different varieties her garden had held. That was in the '70's

Clarence Magical Encounter

Turn the dial forward a few decades to 2001. The first house David and I bought after moving to the Kansas City area was one which had been owned previously by a gardener. Our first spring came with lots of surprises as we watched perennials emerge in all the different beds around the house, but the most spectacular were the iris. The second spring, I noticed they didn't flower nearly as profusely. The clumps of foliage were jam packed together in spots and bare in others among the bed. I decided it was time for reorder and after all the blooms were gone, I sat about digging up all those rhizomes. Mind you, the beds were 4' wide by close to 25' long, on two sides of the house, the west and the east. It was going to take some back breaking work to get it all back to right.


Harvest of Memories
Ecstatic Echo


Nevertheless, I began digging. I had rhizomes all over the yard by the time I was done and the flower bed looked like it had been pelted with mini bombs, large craters where iris once resided now hollow and empty. But, not for long. I grabbed a sharp knife and began the arduous task of dividing. I cut those gnarled, overgrown rhizomes into many manageable pieces. By the end of the day, all were back in the soil, ready to take root. I have to say, that next spring was one technicolor flower show! Many new hues emerged that had not bloomed previously due to overcrowding.


Cherub's Smile
Rave On


Last fall, I went on an iris buying frenzy. I had only three varieties at this property up to that point. As soon as the nurseries brought out their fall bulbs, I was there to nab one of every color. Twenty-nine new varieties went into Blessing Hill's gardens. I share some loveliness and grace with you . . .
Rare Treat

Here's what you need to know if you are interested in growing iris:

Red Hawk


Dusky Challenger


Iris lacks the gene for red pigmentation---Red Hawk getting as close to a red hue as possible. However, iris comes in a huge variety of shades from the palest white to the blackest of midnight blue. They require full sun in well drained soil but believe me, I have iris that do well in the most clay-filled areas of my gardens. Given a light fertilzer in early spring and again in late summer, is really all the maintenance needed. They are extremely drought tolerant. Often, iris can be found growing in ditches on county roads, requiring nothing from no one. I plant my iris between June and September. Iris should be divided about every three to four years to prevent overcrowding.

Rhizome division is essential to flowering. Once iris become crowded, dig carefully around the entire plant and lift from the ground. Brush away excess dirt and examine the rhizome. The rhizomes should be solid and firm. Rot is foul smelling and mushy. If any part of the rhizome displays rot, cut away and discard. (Dip knife into alcohol after cutting away rot so that it is not passed on to other rhizomes.)I like to divide a large, healthy rhizome into three or four parts. Once division is done, allow rhizomes to dry for a few hours in direct sun light. Replant in soil ammended with coarse sand for ideal growing conditions.

The Midwestern June Garden

How interesting has the weather been in your corner of the world? In my corner, it's been drenched, bordering on drowning. Luckily for me, I grow my vegetable garden in raised beds. Not to say they aren't soaked, they are. They just aren't floating. The upside to all this rain is beautiful lush foliage, a large flush of tomatoes setting on the vines, and my water bill about half the cost it would usually be this time of year. The down side? Yes, even in raised beds there is a downside. Kohlrabi, just on the verge of harvesting, are splitting open. The black Spanish radishes, a newbee in the garden this year, are tough. My cabbages are so full of water they are cracking. Oh yeah, and of course, the weeds are flourishing.

For those who've endured at least one hail storm, my heart goes out to you. Hail, as horrible as it can be, is equally damaging coupled with 60 mph winds. Lots of areas around us have experienced just that. Don't dispair. If we can get out from under this weather without further hail storms, some of the plants in your garden can be saved. (I'm jinxing myself here but, we've yet to have significant hail here. I keep praying when the sky starts spitting ice pellets and God's been kind to protect the garden from much damage. We've had pea sized hail briefly and lightly.) What to do now when plants look like they've been through the shredder?

Immediately prune the plants of any damage. A plant will expend a large amount of energy trying to repair its damaged foliage. Remove shredded leaves and broken stems from the plant so it can work on creating new, healthy foliage instead. Don't let plants stand in water. So far, in my raised beds, they've managed to keep draining. But, in those flat, on top of the ground beds, trench the soil to drain water away from plants. Push back mulching materials such as straw, grass clippings, etc., so that the soil can get the sun. And lastly, now is a good time to work in a pelletized fertilizer. Sprinkle it around the drip edge of the plant. The moisture from the soil will slowly released good nutrients to the plant, helping in regeneration.

The picture at the top is of my watermelon radishes. I think the excess water has caused the coloring to be washed. The center should be a full circle of purplish-red, not just a spot. Oh well, David says they are just as tasty. I have to say they've held up the best of the three varieties I planted. I score them as:

watermelon radish A-

white globe radish B-

black Spanish radish D+


As in the second picture, I'd say the purple kohlrabi have faired better then the early white Vienna as far as splitting out goes. This plump purple fellow is a lovely specimen. And the masculine arm holding it for the camera (no that isn't my arm!) isn't bad either!!! Thanks Dave.
Another big problem in the June garden is pests. The red spider mites have made a showing on the tomatoes. Left unchecked, they will destroy the blooms which, of course, results in a lack of tomatoes. The yellow lady bug-looking beatles are after the green beans, the rabbits are fixated on my green peppers, and the white moths are circling the cabbages. What's new, right?

A nice surprise was the volunteer New Zealand Spinach that we ate last night. This is a hardy spinach, loves warm weather, and continues to produce even after several cuttings. If you haven't tried this variety, give it a shot. Once your radishes have played out, replant that row with this variety. Get a jump start on germination by soaking the seeds in water for a few hours before planting. Within a month, a stand of spinach will be ready for picking.

Wednesday, June 3, 2009

Fern Leaf Yarrow: aka Achillea x Moonshine

Yesterday I took a phone call from a good friend of mine I'd not heard from in awhile. He wanted to chat about my favorite subject: gardening. He paid me a terrific compliment by saying all the garden variety vegetables that I'd endorsed were performing marvelously in his own garden. I was thrilled to hear so. When I recommend a certain variety of perennial or vegetable, or even garden tool for that matter, I do so because I want others to experience the joy of something that works, something that flourishes. That's why I just have to recommend Fern Leaf Yarrow, Achillea x "Moonshine".

When I revamped my entryway flowerbed this past fall, I added five Fern Leaf Yarrow into the design. I loved the intricate, dusty green foliage that does closely resemble fern leaves and bought the plants without having seen them bloom. They were some of the first perennials out of the ground this spring and by mid May, they were blooming. I have not been disappointed. The flowers were not only voluminous but also brilliant in color. In fact, they are so bright, I've been having trouble catching their detail with my new camera. They want to blur because they are so vivid yellow. And staying power---those first blooms two weeks ago look as good as the new blooms that have opened in the past couple days. I kept expecting the long stalks to wither, the blooms to dry up. Not a chance.They've even endured thrashing winds and still look fantastic.


Getting back to the subject of my entryway flowerbed, I have to impart a humorous anecdote. As I stated, I planted five but after they flowered, I realized I could really have used six to more nicely fill out that bed. So off to the nursery where I bought them, Dave and I went. I was browsing the aisles when Dave walked up to me holding a beautiful specimen. Always wary, I checked the tag and quickly informed him that he had the wrong variety. I needed Fern Leaf and he was holding Moonshine. Furthermore, I was certain the flower of Moonshine was not as brilliant as my precious Fern Leaf. This particular nursery only carried Moonshine and we were directed to check their sister store for Fern Leaf.

So off we went, arriving at the sister store only to find that Moonshine was the only yellow to prevail. I even asked one of the attendants who consulted with another attendant if the Fern Leaf and the Moonshine variety were one in the same. We decided they were probably not and since I wanted to include it in my entryway flower bed, it was best not to chance getting the color wrong. Instead, we all agreed I should wait until fall and divide one of my present Fern Leafs if I couldn't find that variety anywhere else.

When I sat down to write the previous posting, of which a photo of Fern Leaf yarrow is pictured, I had to laugh at my own silliness. First, for not having checked my faithful garden journal before heading out to the nursery and secondly, for not having trusted my husband's eye when he kept telling all of us that the Fern Leaf and the Moonshine looked exactly the same to him! There was my Monrovia tag for Fern Leaf Yarrow and when I opened it up to read the inside information, there were the words: Fern Leaf Yarrow, Achillea x "Moonshine". Here's something most husbands don't hear too often---Dave, you were right!


Here's some really great info on Achillea x Moonshine:


  • It flowers almost the entire growing season

  • Great for the back of the border because of its heigth, although I used mine at the front and let it drape down over my boxwoods

  • Cold hardy to zone 3

  • It can take the sunniest spot in your garden

  • Extremely drought tolerant

  • Superior for cutting and drying

  • Divides easily

  • Long lasting blooms

  • A truly great perennial for beginners

Thursday, April 23, 2009

A Simple Guide to Planting Tomatoes

Every gardener has their own tried and true method for planting tomatoes to reap the ultimate harvest. I'm no exception. And, although I'm no master gardener, our harvest was over 1,800 tomatoes from 32 plants last year. Not too shabby. So I'll share what I know and hopefully some of my suggestions will be helpful along the way.

It always starts with the dirt. We grow our vegetables in raised beds. I like raised beds for several reasons. I can work around each bed without slopping through the mud in flat ground gardening. In that respect, I can usually get in my beds earlier. We've had so much rain that our property squishes with every step across the ground. However, my raised beds allowed for water run off and weren't soup. I didn't drag out the tiller this year. Instead, I opted for using a hoeing fork that I found at an early spring estate sale. This implement allowed me to turn and work the soil without need for tilling. I then pulled the dirt into tall mounds and allowed them to sit for a week. They dried out nicely and were ready for planting.

Soil tip: With either hand turning or roto tilling, now is the time to amend the soil with compost for nutrition or sand for clay, etc. I use a lot of straw for mulching and water retention. I like to work any excess straw back into the dirt.

The first step is to make a hole in the top of each dirt mound. I dig down as deep as my bed will allow. Tomato plants will root all along the trunk if buried deeply. This induces a network of roots that allows for more water absorption and thus, healthier tomato plants. I then fill the hole with water!!! For years, I've heard gardeners insist on planting tomatoes in dry soil. I think that's fine if it works for them. Personally, I've found that tomato plants endure less shock if they are kept moist until they have taken hold. I place the tomato into the water filled hole and I bring the soil back into a mound around the tomato, leaving just the top tier of healthiest leaves above ground.

Once the tomato is planted, I sprinkle the dirt with a pelletized fertilizer. I use a slow release plant food so that the newly planted tomato will have another means of earlier stabilization. I think it boosts the recovery rate of the tomato plant. Mine seem to take less time to establish.


Since we are still experiencing cool night temperatures, I protect my plants with milk jugs. Placing a milk jug over the plant acts like a mini greenhouse. It also helps to protect the plant from wind damage. (Always remove the cap but keep it handy. If there is a late freeze, replacing the caps for the night will keep frost from damaging new and tender plants. Remove cap immediately after fear of frost is over.) The next step of protection is to add a tomato cage and then pack straw between it and the milk jug. The straw will help keep the jug in place until the tomato establishes and will keep the ground around the plant not only moist but warm as well. Within a week, the milk jug can be removed if frost is no longer an issue. The straw then acts as a mulch for the newly established tomato plant. In no time, I had seventeen plants snuggled into several layers of protection and beginning to establish.

Another good rule of thumb is to plant your tomatoes in stages. I put those first seventeen plants out on April 17th, knowing full well that we could have a frost. But, with the layers of protection, I also knew that most could survive. In a few days, I'll plant the next seventeen. And then during the first week of May, I'll plant my last dozen. Staggering plantings ensures that I'll have a constant crop of tomatoes all through the growing season.


I've been planting my tomatoes like this for the past ten years and every year, I've had a record harvest. I hope that these tip will help you to have a record harvest too!

Wednesday, April 1, 2009

Companion Planting: A Little Planning Yields a Variety of Benefits

Did you know basil will improve the flavor of tomatoes when planted next to each other in the garden? Or that planting green beans next to eggplant will help protect the eggplant from the Colorado potato beetle? Do you have a locust tree on your property? If so, plant Lima beans. They flourish when planted near a locust. Which garden vegetable has the most companions? If you said radish, then you already know something about companion planting.


For those who may be new to this concept, it is believed that certain plants interact with each other in a way that can double yields, provide better use of nutrients, provide pest protection, and/or improve the soil condition. For example, plant tomatoes where green beans were planted the year before. Beans put nitrogen back into the soil and tomatoes thrive on nitrogen. Planting mint near cole crops can ward off caterpillars and other pests. Plant pole beans and corn in the same row. Corn stalks provide a natural trellis on which beans can vine and they like to be next to each other in the garden.

Lots of cold weather plants benefit from their position in the planting row. Here is a list of plant companions to consider when deciding on a layout for your garden:

Cole crops: cabbage, broccoli, cauliflower, brussle sprouts, and kohlrabi all benefit from plantings with celery, dill, onions, nasturtiums, and beets but dislike tomatoes and radishes.

Radishes: like just about every body but cole crops. Carrots, spinach, beets, leaf lettuce, beans, and cucumbers are all compatible.

Lettuce: likes carrots, strawberries, cucumbers, radishes, and onions. Planting on north side of corn so that the stalks provide shade.

Onions: like tomatoes but offend peas and beans. They are also compatible with strawberries, beets, and lettuce.

Peas: are almost as friendly as radishes. They like everyone but onions, leeks, shallots, and garlic.

Later, when the warm weather vegetable go in, consider this list of companions:

Tomatoes: love basil. They are also compatible with parsley and onions. My personal favorite to plant with tomatoes are carrots. Every year I plant a row of Danver's Half Long next to my Pink Girls and they both flourish.

Cucumbers: are friends with peas, radishes, corn, and beans and interestingly enough, sunflowers. Sunflowers help to shade shy-sun cucumbers and provide a trellis upon which the cucumbers can vine.

Squash: like corn, radishes, cucumbers, and marigolds. The marigolds can help to deter the squash bug.

Beans: like cucumbers, beets, corn, and celery but really dislike onions.

Corn: likes potatoes, peas, beans, cucumbers, and pumpkins but keep tomatoes a safe distance apart.

Beets: like cole crops, onions, beans, and lettuce

Carrots: like tomatoes, radishes, onions, and lettuce.

I've planted many of these combinations together and had really good luck.

Tuesday, March 31, 2009

Compost 101: Starting a Bin from Scratch


Spring is the best time of year to start a new compost bin. The grass is just starting to turn green and will soon need mowed. The flower and garden beds are waiting to have all the dry material that overwintered cleared away. Super. Two out of three starting materials are right at your finger tips: green (grass) and gold (dry materials). Now all that is needed is the third material, brown (topsoil), and you're ready to begin.

Above are the type of compost bins I use. They are actually Suncast storage bins that I have converted by drilling ventilation holes in the sides. More elaborate compost bins are starting to show up at retail venues. Do I even think a container is necessary? Nope. You can compost right on top of the ground in a controlled heap. I personally like using a container so that I can control the amount of moisture in the compost. Here are a couple other ideas for converting everyday objects into compost containers or bins:

Plastic trash cans
Pallets nailed together to form a cube
Chicken wire and four posts to form a cube

Use your imagination. Just remember that the compost needs to be stirred or turned on a regular basis and ventilated. Okay. So now you have your container and are ready to begin assembling your compost pile. It goes like this: brown, gold, green. Easy!

1. The first layer in the bottom of the container should be dirt. When I started my first compost bin from scratch, I used regular top soil which can easily be purchased in bags from garden departments. The dirt should be between six and 12 inches deep in the bottom of the container.

2. Now throw in those dried flower stalks. Straw is also a good gold starting material. Just remember to not use woody material that doesn't break down easily. If in doubt, shred before adding to the bin. Later in the season, dried grass from mowing is an excellent form of "gold".

3. Now top that off with a healthy layer of green. Early in the spring, mowed grass is the most voluminous "green" on hand. Green is the water component of the compost bin. Later in the season, I use plant material that I've trimmed from my flowers or vegetable matter from my garden beds.

One layer of each is sufficient to start but if your container will hold another layering, go for it. Okay, now that the layers are complete in the bin or container, leave it alone for two solid weeks. At the end of fourteen days, stir, stir, stir. You should be able to see a marginal breaking down of the three layers. Stirring will further that decomposition.

Now that your compost has been born, it takes fuel to keep it going. Additions of high-carbon matter (gold) such as straw, dead leaves, dry grass and high-nitrogen matter (green) such as grass clippings, vegetable peelings, and used tea bags fuel the decomposition.

Do use:
grass clippings
nutshells
vegetable matter
eggshells
coffee grounds/filters
tea bags
weeds
leaves
straw
sawdust
bark
shredded newspaper
old potting soil

Don't use:
meat
dairy
diseased plants
manure

Turn the compost once a week with a turning fork. It is essential for the compost to get enough oxygen, thus the ventilation holes in plastic containers. A foul smelling compost is rotting not composting. A thorough weekly turning is essential to provide oxygen to the layers. The compost should smell fresh and sweet. If a foul odor persists, the compost is too wet. Add more gold! If the compost is too dry, it won't break down. Add more green. Soon, your bin will be filled with rich organic material ready to be added to flower and garden beds.

Tuesday, March 3, 2009

Off to a Good start with the Basics


About 85% of the information found on this blog is written with beginning gardeners in mind. The other 15% of the content is purely anecdotal. Why? Because some times it's just fun to share things I find amusing or interesting or even infuriating. This particular posting is the result of a simple question I've been asked a fair amount lately, over a short period of time:


What did I do wrong?

This particular question is then followed with anecdotal information of the questioner's own, often stating a certain problem and the outcome. The garden season is just around the corner and new gardeners do not want to have a repeat of poorly performing vegetable plants. It's no fun to garden if the garden doesn't produce. Period.

A good harvest begins with the basics: Soil, Water, Fertilizer, & Air

Soil

I don't pretend to know a thing about soil in Utah or Maine or Kentucky. Don't ask me. However, do ask me about southeastern Kansas and northwestern Missouri. I've gardened extensively in both areas. Here are a few questions to ask yourself when determing your soil type:

1) Does the soil become sticky when its wet and form hard, rock-like clods when its dry?

2) Are dandelions, chicory, sorrel, and thistle the first greenery to grow after the soil is tilled?

3) After a good rain, do water puddles remain on the soils surface?
If answering yes to these questions, that's the first elemental part of solving the problem in what went wrong. Clay. Clay soil is a burden. It often discourages first time gardeners from every trying again because its nearly impossible to work, only the hardiest of plants will grow in it, and it is so lacking in fundamental nutrients that what does grow is often deficient in quality. What to do ?I have two solutions but one depends on your timetable.

If you aren't in a big hurry for expedient results, you can amend the clay. The quickest possible way to amend clay soil is to mix it with compost. You can create your own compost or it can be purchased from a garden center. I bought a trailer load of compost last spring for about $30. Also check with city recycling centers that accept lawn and garden debris. That debris is worked into compost and is often given away for free or for a very nominal fee. Gypsum (calcium sulfate) is an excellent conditioner for clay soil. It can be added at 20 pounds per 100 square feet of garden bed. Peat moss is also a great additive which helps the soil retain air. In the fall, till rotted manure and chopped leaves into the soil before the garden goes to sleep for the winter.


No time for that process? Buy good top soil from a garden center and replace the clay. Even at that, I still add compost, gypsum, and peat---just not as much. The soil is the foundation, the most fundamental element in which everything depends.

Water
I've heard many a gardener brag: I don't have to water my garden. That is pure crap. Unless weather conditions are perfect the whole growing season long, everyone waters. Buy good equipment the first time. I prefer four-ply, rubber reinforced mesh hoses equipped with heavy duty brass couplings. They last and last. I scatter hose guides throughout the garden so that the hose glides along the guide instead of falling on and crushing my plants. Osciallating sprinklers can cover a large area but up to 25% of the water may evaporate before reaching the soil. Personally, I'd love to have a low-volume irrigation system but I'm not rich. I've settled for soaker hoses. Made of canvas, they seep water along the entire length of the hose, wetting the soil 2 feet on either side. They are great for vegetable gardens but I also install them in my flower beds. Water deeply but infrequently. This forces the plant to develop deep roots. The only deviation from this: keep seedlings moist. It's doesn't do to let them dry out. Use mulch or straw to retain moisture until the plant can fend on its own.

Fertilizer
Let's face it, do you know of a harder worker than a vegetable plant? Most are transplanted into the garden when they are but a few tender weeks old, quickly they generate doubling their beginning size over and over, and they produce offspring in hoards if well tended. No matter how good the soil and water conditions are, the plant can use a little something to eat now and then! Last year I had 32 tomato plants that produced 1800 + good tomatoes. That's not counting the ones insects or birds destroyed. Yes, I fertilize them. I prefer a granular pellet that I can either top dress (sprinkle on at the surface) or broadcast (throw from a hand held spreader).
Let's talk about principal nutrients or the big three: nitrogen, phosphorus, and potassium.


Nitrogen (N) promotes healthy, abundant foliage.
Phosphorus (P) stimulates root growth and aids in plant maturation
Potassium (K) promotes healthy, abundant flowers and fruits


Look on the back of the fertilizer package to determine the amount of these nutrients. I think that the ratio of each element should be equivalent to the total mass, for instance 10-10-10, for heavy growers like supertunias. In the garden, I first feed with a granular that promotes heavy growth in foliage, 10-2-6, until the plant begins to flower and then I back off because too much nitrogen can inhibit flowering and in order to get vegetables, the plants must flower. I then use a fertilizer heavier in phosphorus and potassium to set and develop the crop.


Organic fertilizers are derived from animal or plant matter as in bonemeal and manure. I don't fool with these once the plants are in the ground because they can wreak havoc. They contain so much nitrogen that plants literally burn up.

Air

Believe it or not, the success of the garden also depends on air and/or the circulation thereof. All plants need air to stay healthy. Air works to dry out garden beds so that plants don't stand in swampy soil. This eliminates the production of fungus or mildew. Give plants their space. Know how large around a plant will get and plant accordingly. Air should flow freely between plants and circulate above and beneath foliage.

The other factor of air is its ability to infiltrate soil so that the soil doesn't compact and stunt roots. The freer the roots are to spread and travel, the healthier the plant. About once a month, I check all my vegetable plants to see how easily the soil moves under the foliage. If compacted, I use a turning fork to gently loosen the soil. I carefully puncture the dirt around the drip line (a circle around the plant where the heaviest roots have yet to grow) and gently turn the fork back and forth.

If you can master those four basic garden elements, you'll seldom ask the question What did I do wrong and instead will replace it with Wow, look what I did right! Another invaluable resource is to make friends with an experienced gardener who doesn't mind answering questions. In fact, if you live in my area and have gardening dilemmas, feel free to email me. There's nothing I like better than to talk garden!

Wednesday, February 11, 2009

A Winter Coat or Just Ugly Debris: It's all in the way you look at it

I think its almost an instinctive reflex for some folks to run right out and cut dead/dying foliage to the ground level once a hard frost has taken the life out of annuals, perennials, and ornamental grasses. Why? When I pose that question, the answer I get back most often is: Because now it just looks messy! I suppose that's all in how you perceive it. I can see how someone looking at the dried foliage in the picture to the left could view it as disorder. Some of the thick blades of the strawberries 'n cream perennial grass have broken under the weight of ice and snow and have fallen over. The seed stalks constantly tussle the winter wind. But I kinda like the brushy, unkept appearance---the winter coat, so to speak.


The winter coat is a provider, feeding birds and other small animals. In late winter when the yellow finch begins to migrate north, they stop and feast on the black buttons of rudbeckia seed. The dried stems and stalks become a habitat in which small animals can seek shelter and where cocoons attached to the dried foliage slumber spring's butterflies.


The winter coat is a regenerator. There are some perennials that must reseed themselves in order to propagate. Violas, for example, reproduce in this fashion and who wouldn't want to leave the dry stalks in return for all those dainty, smiling faces to proliferate a garden bed in the spring? Several varieties of the lychnis family reproduce in this manner as well.


The winter coat is also an identifier. I don't accidentally dig into a clump of roots during early spring planting if I've left the dry foliage of a perennial in tact. Yesterday, we were having a bit of spring like weather. The temps rose into the upper 60's. Lu and I were out scouting around the beds in the back yard and I noticed that among the dried branches of perennials, weeds were beginning to sprout. I think its easier to identify the weeds if the dried foliage is left in tact. We immediately irradicated the offenders.


The final reason I like to leave the winter coat in tact is for protection. I've found that the dried foliage can act like a barrier for tender green foliage in a late spring frost.


Of course, there are always exceptions. Bluebeard caryopteris is one of those marginal perennials (living in zone 5 with extra care but preferring the climate of zone 6) that if cut back to a three inch crown and then mulched heavily, will survive our Kansas City winters. Another exception I make is for my ornamental tree, Hakuro Nishiki Variegated Willow. It is actually a shrub grafted to a standard. In order to protect the junction of the graft, I like to cut this tree back to a nice uniform sized ball of branches. The ice can collect on these shorter branches without much worry about the breakage suffered on longer branches coated in ice and whipped by a winter wind.

Typically though, most perennials, shrubs, and trees require no late fall shearing. Even the most sturdiest appreciate enduring the coldest season in their winter coat.

Wednesday, January 21, 2009

Hard Copy Garden Journal: A Fail-safe Way to Back Up One's Memory

Yesterday was certainly blustery here. Out my office window, the leaden clouds draped the sky and blotted out the sun for the biggest part of the day. It's nice to see the daylight break through today and the forecast high is for the 50's. Gotta love that!

Decided to catch up on a project yesterday that's long over due---and note, still not done---requiring lots of time and attention. Every year I put together a hard copy garden journal for my records. It starts early in the spring when I first begin buying/planting/building/sowing. From plant tags to blue prints to receipts, I save it all. I can't tell you how often its served as a clone of my own memory. Someone will ask me, "What's that plant called?", and if its something fairly obscure, I'm not likely to pull it from the depths of my middle-aged brain. So I sat down at the dining room table where I could really spread out the contents of the manila envelopes I'd collected and got busy.

I put my journal together in sections. I catalog all like things together, such as all perennial tags in one section for quick reference and that just happens to be what I was working on yesterday---perennials. Of course, I'm not likely to forget that the name of the coneflower in the above picture is Coconut Lime, which, by the way, just happens to be one of my favorite Echinaccea, but once its tag is secured in my hard copy journal, I also have a record of when it was planted. From Apricot Delight Yarrow to Veronica Fairytale and everything in between, I have a tag and it goes in my journal.

We were busy last season, especially with building all the new perennial beds but, until I sat down to put the journal in order, I guess I didn't realize how busy I was at planting. I have 101 different perennial tags alone. Considering the fact that I rarely buy just one of anything, the plants that went into the ground last season numbered in the hundreds. Wow! Of course I planted several variations of the same family. For instance, this tiny beauty at the right is Beaujolais Bonnets, Scabiosa Atropurpurea, (don't you love how the name Beaujolais Bonnets rolls off the tongue?!?) but I also planted its cousins, Pink Mist, Butterfly Blue, and Vivid Violet---all with their own distinct botanical names as well. There's no way I'm going to remember all that information and searching through books or online garden sites for that info is just too time consuming. My hard copy journal is a godsend. I alphabetize all the tags and its a snap to find what I'm looking for in a hurry.

I did manage to finish the perennial section yesterday afternoon. Now its on to rhizomes. I did manage to sort those tags and again I was amazed. According to the number I collected, I planted 32 different varieties of iris---7 pinks alone! And without going into the diningroom and conferring with the tags, I can't remember a name of a single one.


Beginner's tip: Other information that can be added to a hard copy journal is where in the garden a selection was planted, how it faired and grew, likes and dislikes, etc. It's time consuming but I think its worth it. Later in years, you'll have an entire index in the volumes of handwritten journals that could come in very handy if one was to say, sell their property and pass that info on to a new owner.

Thursday, January 8, 2009

Too Common

Yesterday I received a garden magazine in the mail and on the front cover was a picture of a pristinus ebur zinnia. (No, Latin is not a second language for me. I just felt that calling it a pristine ivory zinnia didn't heighten its descriptive appeal all that much.) Anyway, one thought led to another and soon I was recalling a moment this past summer while I was at Lowe's garden department looking for filler annuals for bare spots in my perennial beds. A woman was shopping with her daughter, a child of about 5 years old, and the little girl was enthralled with a display of marigolds. Those bright orange and yellow hues really had a hold on her attention. I could easily relate. Marigolds are always a favorite standby in my own mother's flower beds. It was all quite a nice memory for me and then the child asked her mother to purchase those marigolds. I really was taken back by the woman's negative answer. It would seem that marigolds weren't good enough for this woman's garden because they were too common.

I must say the reason I relate this particular memory is because as soon as I saw the zinnia on the front cover of my magazine, the first thought that popped into my head was, I'm surprised they chose such a common flower. Oh I know---bad garden fairies will probably rain down on me!!!

So what is common? Isn't it that that is not distinguishable from the ordinary?

Some of the most distinguishable annuals in my 2008 garden beds were my tall zinnia. They ranged in color from a white so pale it almost appeared lime green to the brightest, deepest scarlet pinks, and everything in between. I was also blessed with a wide variety of structural shapes: star, pompon, and rosette just to name a few. When the perennials had given up either due to spent blooming time or just plain ragged Midwestern heat, the zinnia became the crowning glory along with other old favorites like begonia, vinca, cosmos and salvia. It's the annual that is the workhorse of the garden, blooming an entire season until the first vestige of a mean spirited frost puts them forever to sleep.

Beginner's tip: Almost all annuals produce easy-to-reap seeds that can be planted the following spring. Zinnia, cosmos, and marigolds are especially good choices for seed collection. Often the marigold will self-sow. Another really good annual that grows well year after year in my garden is Victoria Blue salvia. In fact, I planted it on the south side of my house (remember I'm zone 5) and it comes back like a perennial.

Monday, November 24, 2008

Container Gardening: Consider the Container First

Container gardening has become all the rage over the last few years. Every time I pick up a gardening magazine or peruse a gardening website, I can rest assured I'll find an entire section devoted to the subject. I can also guarantee there will be tons of information at my disposal on how to choose complimentary color combinations for my containers or how to match foliage structures to the container's design elements or even how to layer spiky/bushy/viney plantings in that same said container for dramatic visual effect. But, where is the actual aspects of the container ever addressed?

So, let's talk containers.

Container depth (priority #1)
In my opinion, no other factor is as critical to successful container gardening than depth. Nothing is more frustrating than plantings that either don't grow well or do grow well at first but then quickly fizzle out. If what's above the rim of the container is lush with foliage and blossoms, then what's below the rim has to be a healthy root system. Shallow containers are prohibitive to healthy root systems. There are only two reasons to purchase shallow containers, 1) the container is going to be sited in a continuously shady location or 2) the container is going to be home to cacti or succulents. Shallow containers assimilate dessert conditions perfectly when placed in direct sunlight.
As far as I'm concerned, if a container can't hold at least 24 inches of soil for root development and 1 inch of gravel for adequate drainage, it doesn't belong in my garden. Having said that, I will admit to owning a few shallow containers---lessons learned in beginning gardening. For example, I bought this lovely three-tier planter in my early gardening years. The largest basket is at the bottom of the tier with a depth of 5 1/2 inches, the center basket 5 inches and the top basket measures in at a whopping 4 1/2 inches, thus the additon of the coconut liners which add an extra inch or two of depth. Instead of being sited in full sun on my westerly exposed back deck which was my original intention, the lovely three-tier planter resides in the shade of my easterly exposed front porch. Even so, successful growing in these shallow baskets requires daily watering and, depending on the type of planting (supertunia and sweet potato vine), daily feeding.

Container types
Simply from a durability standpoint, I prefer concrete, resin, and fiberglass over wood, ceramic, and metal. I especially like the new urns and pots that are made of a stone/fiberglass combination (stonecast) for the tough exterior quality and yet easy movability. Plastic on its own is tacky---just my own personal opinion.


Container shape
As long as a container has depth and is made of durable material, the shape is merely a matter of preference. The exception is in the hanging basket. I want my hanging baskets to acheive that nursery-like gargantuan fullness with the ability to grow and bloom from mid spring planting all the way through summer into fall. Therefore, the only shape suitable to meet my expectations is the cone.
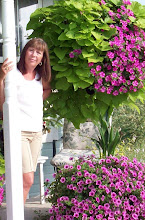
The cone offers the most optimal surface area for healthy root development. The cone in the picture is 24 inches in diameter and 28 inches long. The large diameter allows for multiple plantings without crowding and the spacious depth offers the roots a place to stretch out and grow. Most hanging baskets become root bound within a few weeks and then the flowers suffer.
The construction is a combination of coconut fiber and sheet moss over wire. These cones are very large, requiring eyebolts driven into studs to keep them secure and stable. And, because of the weight put upon the eyebolt, only potting mix not potting soil should be used. These cone baskets can be found at any nursery. I bought mine from Farrand Farms.
Not to be overwhelmed, (I've been told by more than one nursery worker that people buy these baskets and then return them) nurseries carry several smaller sizes. I noticed this past season that even the big box stores are starting to carry the smaller cones as well. Just remember, the smaller the cone the less area for root development. By the middle of summer, the foliar diameter of this cone basket was easily six feet.
When the container is considered first, the results are nothing short of dramatic.