Showing posts with label projects. Show all posts

Thursday, January 22, 2009

Spring Dreaming, Winter Planning

It's amazing how the warm sunshine through a winter window or a simple spike in the outdoor temperature for a day can set our gears in motion. I can't say it's been a particularly bad winter here---the frigid temps have been annoying but the usual snow/sleet/ice hasn't fallen---and yet, I'm already hearing rumbles of cabin and/or spring fever. At my volunteer job yesterday, I had more than one inquiry about starting indoor vegetable seeds. I too am so eagerly looking forward to that day. January's almost gone, February is leap, soon it will be the first of March and time to drag the grow lights out of the basement (I don't have a greenhouse and our dining room faces the east but its our largest window and best source of natural light and the grow lamps supplement) and set up the dining room greenhouse.

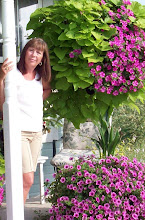
Until we can get outside and head down the garden path (thus the reason for today's picture), there are a few activities I do about this time of year to help beat the winter blues. In a nutshell, I start planning. Once spring arrives, I like to have a solid idea of what, where, when, and how I'm going to execute all my necessary tasks. For instance:

Vegetable Garden Layout

This is huge for me!!! Now more than ever, food pantries across this country are in crisis. Not only do I need to think about how much food my household is going to need but then I need to consider what I want to grow for the food pantry, when I want the first harvest to start, and where should I plant seedlings for maximum output.

1) Drawing up a tentative layout is essential.
a) I like to consult companion planting charts, which I'll talk about in a separate posting as we get closer to spring. There's a ton of information on companion planting on the web and it's worth sorting through and reading.
b) I rotate my tomatoes so they are the first plants I establish on my layout.
c) Once I have the tomatoes on the layout, I can work on row arrangements.

I can actually spend a number of hours on this activity alone.

Hanging baskets, urns, and planter design

I was extremely pleased with my floral arrangements in my hanging baskets, urns, and planters last season because I went to the nursery with a list of the materials and/or plants that I needed. I can get to the nursery and get terribly side tracked by how they've planted their containers, end up buying things I don't plan for and quite frankly, buy things I don't really want or need. It saves me not only time but a lot of money.

Soaker hose layout

Last fall I walked into Lowe's garden department and found 75 ft soaker hoses on sale for $1 each. I bought 40 of them. I definitely want a plan on how I'm going to string them through the garden beds for maximum coverage. They've been wound tightly in coils, so I'll need to stretch them out and let them lay in the sun for a few days to get the kinks out.

Collecting and Gathering

I saw a neat idea on the web wherein paper egg cartons were collected and then used as starter pots for seedlings. Innovative. I have started saving my plastic milk cartons which I use to protect my tomato seedling that first week out in the garden. It's a great time to begin buying seeds from catalogs. I even start stock piling fertilizer for my hanging baskets.

Pruning

One outdoor activity that is perfect for this time of year when the temps spike briefly is pruning. I love to inspect my trees and prune them while they are dormant. That activity also takes me past shrubs and rose bushes to inspect for winter damage.

Hopefully, spring will come early and April will be kinder than the two previous years. NO LATE FROSTS, please! And we'll be ready for it, armed with our best laid plans.

Tuesday, January 6, 2009

Suncast Gazebo

Happy 2009, everyone! Now that the new year has found us once again, it's time to start thinking about the coming spring. I always have at least one new project brewing in my head by this time, if not a half a dozen! With the holidays out of the way, I'm ready to rush full steam ahead with the planning. This year, I need to research the exact design I want for my new potting shed. Don't know if it will happen because of the economy and having to tighten our belts but it doesn't hurt to be prepared (or dream). Hopefully, I'll be able to share the capers of its fruitation at a later date. But for now, let me tell you about last spring's project.

I've always wanted a gazebo. I remember New York vacations at my grandparents' house, whiling away the heat (their idea of heat anyway---I'm a Midwesterner, please!) of summer in their shaded gazebo. My grandfather had a family of chipmunks that came visiting on a regular basis to rifle his pockets for peanuts. Good memories.

Every year we talked about building a gazebo but unfortunately for me, my husband's occupation involves industrial construction and spring is just when those huge projects are gearing up as well. That's why I began to consider kits for time and convenience. Wow! I had no idea how much was out there and how much was available. So here's my first tip: Know what you need/want. My needs were simple. All I wanted was a structure to 1) compliment the west side of my courtyard and 2) allow enough room for Dave and I to sit comfortably and enjoy the evenings together.

My second tip: know what amount of maintenance you are willing to provide over the life of the gazebo. Quite frankly, we wanted very little if any maintenance at all. Those wooden gingerbread laden gazebos are fantastic to look at but we didn't want the time consuming job of yearly staining or painting. That's why I chose the Suncast Gazebo. It's rigid resin construction will not splinter or rot.

And lastly, my third tip: know the amount of skill level required for assembly. I am not a carpenter and my husband didn't have much time for building. We needed a fast, easy solution. The Suncast Gazebo required only a platform for anchoring. David was able to build that in a day.

So, after all my research, I ordered my gazebo and this is how it arrived at my doorstep:


(This is a freight-only item because of it's sheer size---two large pallets long---and weight. The trucking company will ask if a dock is available or if they need to send it on a lift gate truck.)


Although David assembled 90% of the gazebo without my help, it really works better with an extra set of hands. The rails can be tricky but otherwise, it's a peach to put together. I believe anyone could assemble this gazebo in one day. The finished measurements are 10'X10' and it easily holds a table and four chairs. However, many people have told us that they think it's an ideal structure to place over a hot tub! I would concur it weren't for the fact that we meant it as a stopping place, either at the end of our courtyard or as a spot to rest before moving on to the koi/goldfish pond. We spent many a fine summer evening sitting under it, watching the sunset. I believe the Suncast website shows the gazebo anchored to a flat, square platform resting atop the ground. We chose to raise our platform to give the gazebo a bit more height and David designed the platform to follow the same octagonal shape as the gazebo itself. We also left off one set of rails so that we could enter and exit from more than one side instead of enclosing the inside circle.


We finished the platform by closing it in and then added flower beds and a gravel path around it. I cannot tell you how many compliments we've received. The manufacturing quality is such that it looks just as great up close as it does from a distance. A top notch product.

At Christmas, we outlined the gazebo in twinkle lights and it was really something to see at night.

So, if you are into planning your winter projects early like I am and you choose to make the Suncast gazebo your project of choice, I'd like to hear about it. Feel free to email me at:

GardenGenn@msn.com

I'd be happy to respond to any questions you might have.